Friday 28 June 2013

Smokey Eyes (Easy Day to Night Transition)

Today's tutorial is absolutely fun and the response that I got on the sneak preview was amazing so thank you for that!I had an absolute blast while shooting for this one.Its a transition day to night look revolving around my fascination with another costume headgear .I made this for my fresher's at NIFT.

Step 1:Like always prep your lids with nyx jumbo pencil or any other white pencil that you own.It is really important so that the lighter colours show up.I even added a layer of my inglot creme concealer in the shade 'LW 200' from the freedom system palette.  


Step 2: I added a purple cream duo-chromatic eyeshadow onto the crease area with my fingers.
Using streetwear in 'Spice Girl', it is a gorgeous shade and is super cheap.The color payoff is not that great but can be built up easily .


Step 3:Next I added Pink generously to the crease area.I'm using nyx in 54cherry.


Step 4: Next I added a purple eyeshadow right below the pink.Now with a clean round eyeshadow brush i blend in the colours ensuring not bringing down the colours to the lids.I used Purple from Faces in.
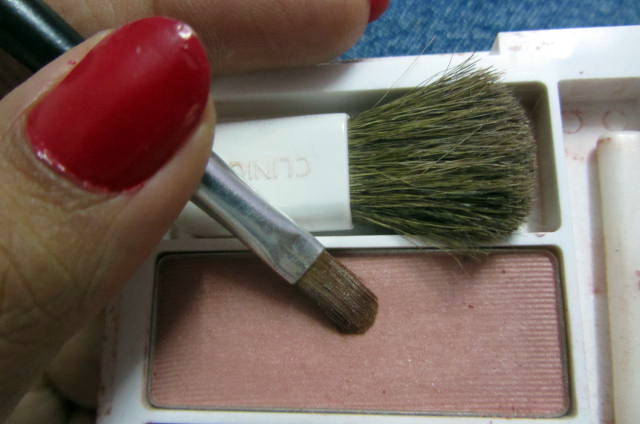
With flat brush I pat down the lighter shade on to my lids,using Dusty rose from the Rosewine Pallette by Clinique.


Step 5:At this point I tight-line my eyes for making my lashes look more fuller with Amyway's attitude kohl in black,fill in my eyebrows with eyebrow duo from Faces.

Step 6: Add your favourite mascara.I used two generous coats from the Lotus herbals botanical Mascara and lined my water line with the same kohl.I did not a very harsh line ,thus smudging it with an angled brush and bringing it outwards.


Step 7: Add a shimmery eyeshadow in light colour .I used a dusty nude colour from Active pallette in a shimmer finish.


Step8:Ta-daa*Drum rolls* YOu are done.This is how I wore it during the day.


Sorry for the bad quality of the picture.Here's a comparison between both my day and night look.See how easily a colour could make all that difference.


Step 9:In the center  of my lids I start by patting black eyeshadow. I'm using  loose shadowfrom  Jordana,it is jet black and has this little specks of shimmer that are gorgeous.


It can be hard to build up on the colour since we have used a very light colour and in pearl finish,but the key is to just pat down and press the colours.


Step 10:Blend,Blend,Blend...preferably use a clean dome shaped brush.


Step 11 :To give a little definition I added a thin liner and flicked it a bit.The choice of liner if your here,you can add fake lashes or liner,just don't over do it.We want our shadows to be the star of the look.


Step 12 : I paired it up with very Pink lips.I used nyx Matte eyeshdow on my lips first and then added Faces lipstick in cotton candy.
Step13 : I wore the almost natural blush from Clinique's palette very lightly.


So moving on to the complete look I paired this glam makeup with a head gear I made for Fresher and the gloves. The pictures are meant to be oh -so sensual and blah :P
I tried my best,I just need a better background I swear :(  *Puppy face*


Talk about bad Photoshop skills and get ready to witness some!How am I tired f clicking pictures in my balcony= awry neighbors + gaudy backgrounds .So All I wanted to do is change my background into pitch black but instead ended with THIS!Oh yes I'm trying to be all mysterious and nasty LOL! 
p.s. I even made the lace gloves by cropping out my leggings :P


Ring: Blur 
Top:Boutique

I really hope you like this post.See you in my next post real soon,
XOXO


Wednesday 26 June 2013

Quick Work Appropriate Makeup(And Hiding those Puffy eyes)

Good afternoon,
So this post is dedicated to our puffy tired eyes also the dark circles the our no-sleep work-tight schedule ! Also it was a request so definitely most of us are going to relate with this post,well I hope so ^_^

I picked up some tips and tricks from Michelle Phan whilst working on my look.So go ahead am quoting the blog "Hi everyone,
If someone told you your eyes looked puffy, you might get embarrassed – but in some parts of Asia, it’s actually a compliment! First, it’s important to know that puffy eyes are not the same thing as eye bags.  Eye bags are usually darker than your natural skin tone and their sagging look can age you (here’s a way to GET RID OF THEM NATURALLY).  Puffy eyes are the opposite – because they are commonly found in children, they’re actually supposed to make you look younger! Koreans call puffy eyes “aegyo-sal”, which literally means “charming fat”.  Though it might sound kind of strange, the aegyo-sal look is actually an easy way to give yourself a more sweet, youthful appearance.  Here’s my tutorial on how to achieve this look:"http://michellephan.com/blog/post/new-tutorial-puffy-smiling-eyes
Moving on to me and my way to combat this look,I skip the liner on water line and move the focus to my lips(Smart ehh?)
Here is my tired face,just back from work sans makeup and post facewash :(


I start by cutting up my blue veins(oh no not literally),using Maybelline Tattoo in Fierce and Tangy, all over my crease area.(I tested several shades from this range (though not every single shade individually) from the range for twelve to sixteen hours. I wore each of them alone, not with other products, primers, or eye-shadows  I didn't experience any budging, creasing, fading, or smudging.


Add Nyx Jumbo Pencil in Milk under my browbone and add a neutral eyeshadow over eyelid.


Add a light brown on your lashline,smudge it well ( we are just trying to cast a shadow  effect under)Please do not let it seep in the waterline.We do not want to highlight that area at all.


Draw the thinnest liner that you could possibly,keeping it as close to the lashline .We want to emphasize on our natural eyeshape.


Add A bucketful of mascara !Oh yeah we need it!


Add a pearl based neutral eyeshadow to your inner corners and blend it out well.


In the end I go around and add concealer only wherever needed .I do not intend on bringing unnecessary attention to my bags/PUFFY EYES!


Here are some budget friendly Lipstick Option I personally Prefer Wearing To Work.


Maybelline Hooked to Pink-->1
Anna faris-->3
Maybelline -->2
4.Street wear in-->6
5.Lotus Herbals in Carnation-->5
Faces Candy Floss -->4


I made the post super easy and its very easily malleable .Go ahead experiment just remember to shift your focus from under eye bags! We sure do love attention but only at the right places :D
I hope this post was helpful ,Keep writing to me I love reading your messages and inspires me to get things done!See you soon in my next post,
XOXO!


Tuesday 25 June 2013

Costume Accesories Series Part 1

Hello my babydolls,

So like my sneak preview suggested ,Yes I'm super excited to do a series on costume accessories.NO I'm not done with graphic liners yet but I dint feel like doing another post in line related to liners.Here's this real fun LOTD that I tried to built around my hair accessory which BTW I'm in love with.I got this particular piece from  a local boutique in Kannur for INR 250/-(Such a steal,Right!) and who doesnt love hair accesories?

A L'il Gyaan(I loved history!)

Flowers have been worn for personal adornment throughout recorded history. Their purpose has been for both beautification and ceremony. Earliest uses in ancient Greece varied from single flowers worn in the hair as a personal touch to crowns of flowers and foliage for the head of both men and women as a symbol of achievement.Today the emphasis is specifically on personal beauty as the flowers enhance the appearance of the wearer and the apparel, with the bonus of an uplift for the wearer's spirit and inner beauty. I am impatient to do that, the malaise of the urban Indian woman


About the LOTD:
I tried keeping the look real chic by putting up the most cliche combination of red matte lips and real thick winged liner!
I wore my concealer on my water line.While the concealer did not sting at all it did tug my waterline which explains my unblended look.This is how I wore the Hair brooch while putting my hair in a messy updo held only with  3 bobby Pins and curled some ringlets of the hair which came out loose naturally. Also have posted photos wearing just the brooch in my hair and sans the brooch of the makeup too!


 I just cant get this picture to straighten up for heaven sake!


Here's a break down on my LOTD:

Face:
Maybellibe BB cream Stick in Fawn
Inglot Freedom System BLush refill in shade no:30
Giordiano Bronzing Pearls in Natural Bronze

Eyes:
Marie CLaire eyeshadow
Clinique Pallette- rosewine duo
Lakme Liquid Liner
Oriflame VeryMe cover-up Concealer

Lips:
Colorbar Matte Hot Hot

Dress:Forever 21 Leopard Printed Maxi


I  hope you guys had fun enjoy reading the post as much as I did working on it.WOuld love to hear back from you .Until then,
XOXO

Thursday 20 June 2013

The Perfectly imbalance LOTD

Good evening my marshmallows,

So I wanted to try a look (yeah well just for the sake of it) from the palette that you have just received. thus my LOTD will be self explanatory when you see my MOTIVES  by Loren Ridinger,
palette that all of us received in an edition of Velvette Box.My eyes were absolutely glues on to the gorgeous peachy colour and the violet.Well green is pretty too but I'm never really fascinated with the colour. So moving on to the LOTD ,it is absolutely a throwaway look put together. Mostly unblended you';; see that I'm pairing up with glossy lips from Bourjois 3-D effect Gloss.
*psst..psst*You shall even notice that there's no concealer here!
This is not a tutorial just an LOTD post I'm doing!


Let me know how do you like it? Did you ever frantically put together a look and wear it out too?
See you in my next post,till then take care!
xoxo 

Monday 17 June 2013

Gaphic Liner Series : Part 3 (p.s. I even cut my own hair)


Good morning my beautiful Ladies,
How did you guys spend your weekend?I celebrated father's day with movie marathon!
Also cooking together!
Let's get set to combat Monday blues with this preppy number.
It's a super simple,edgy and very wearable look.I'm using affordable drugstore makeup for this look.
So we basically start with the same steps(which you'll know if you have been following my tutorials).

Step 1:We prep the eyelids with Nyx Jumbo pencil in the shade Milk.This will help the  lighter colour to show better on the lids.


Step 2:Blend it well upto your brow bone.


Step 3:I use a wash of dusty mauve on my eyelids which is matte.I used the blush from my Clinique pallette(oh yeah!I use products for multiple uses!)


Step 4: Again using another shimmery dusty rose on the center of your lids and inner corner of your eyes(I used A shad from my Active Pallette).


Step 5: Trace your crease line with any brown liner.You can use gray too,black becomes too harsh.I used Nyx's auto pencil in Brown.


Step 6: Here comes the fun part.I am creating the very literal cat ears i.e. two triangle on the ends.


Step 7: Filling in the triangle and lining my lower lash line with liquid liner.Also add milk in the water line(optional)


Step 8:Add much mascara as you wish.I used Lotus Herbal Mascara in Black.


I wore this fun band with a bow(Accessorize) with a bumpit! :D


This is what it look like on me.I wore it with Maybelline 14 hr Matte Lipstick in the shade 'Stay with me Coral' along with blush from Purely Pro in 'Strawberry'.


AlsoI finally cut my entire hair which I have been meaning to do for a long time now.I cut off all coloured bleached ends.This is what it look like!


Oh yes and I wore it my Dad on the movie marathon yesterday with my current favorite aztec racerback!


Tell me how you like it/How does my hair look?Will you try this graphic liner look ?
See you bubbles in my next post 

Until then,
XOXO.